An Automatic Needle Threader is an ingenious mechanical device designed to effortlessly pass thread through the tiny eye of a needle, a task that can be challenging, especially for those with poor eyesight, unsteady hands, or when working with very fine needles. It transforms a frustrating, time-consuming chore into a quick, one-step action.
The Core Principle: How It Works
Despite its simple operation, the mechanism inside a standard automatic needle threader is a clever piece of engineering. The fundamental principle involves a fine, rigid wire that forms a miniature "hook" or "loop." This wire is thin enough to easily pass through the eye of the needle. The user places the thread against this mechanism, and when activated, the wire retracts, pulling the thread with it back through the needle's eye.
Let's break down the mechanism, typically found in handheld or sewing machine-mounted threaders:
The Lever and the Crank: The primary component you interact with is a lever or a small handle. This is connected to an internal crank mechanism.
The Fine Wire Arm: A thin, L-shaped metal arm (the wire) is connected to this crank. The tip of this arm is bent into an even finer, almost invisible hook or loop.
The Sequence of Operation:
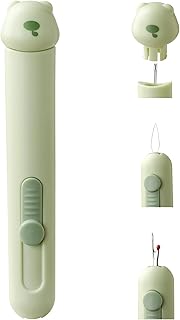
Positioning: The needle is placed into a dedicated slot, aligning its eye directly in the path of the wire arm.
Engagement: The user depresses the lever. This action rotates the crank, which pushes the fine wire arm forward.
Thread Capture: The wire passes completely through the needle's eye. The user has already laid a piece of thread across the path of this wire.
Retraction and Looping: As the user releases the lever, the crank reverses, pulling the wire arm back. As it retracts, the hook on the end catches the thread and pulls it back through the needle's eye, creating a loop on the other side.
Completion: The user simply pulls the loop to draw the full length of the thread through, leaving the needle threaded.
Common Types of Automatic Needle Threaders
- Hand-Held Needle Threaders:
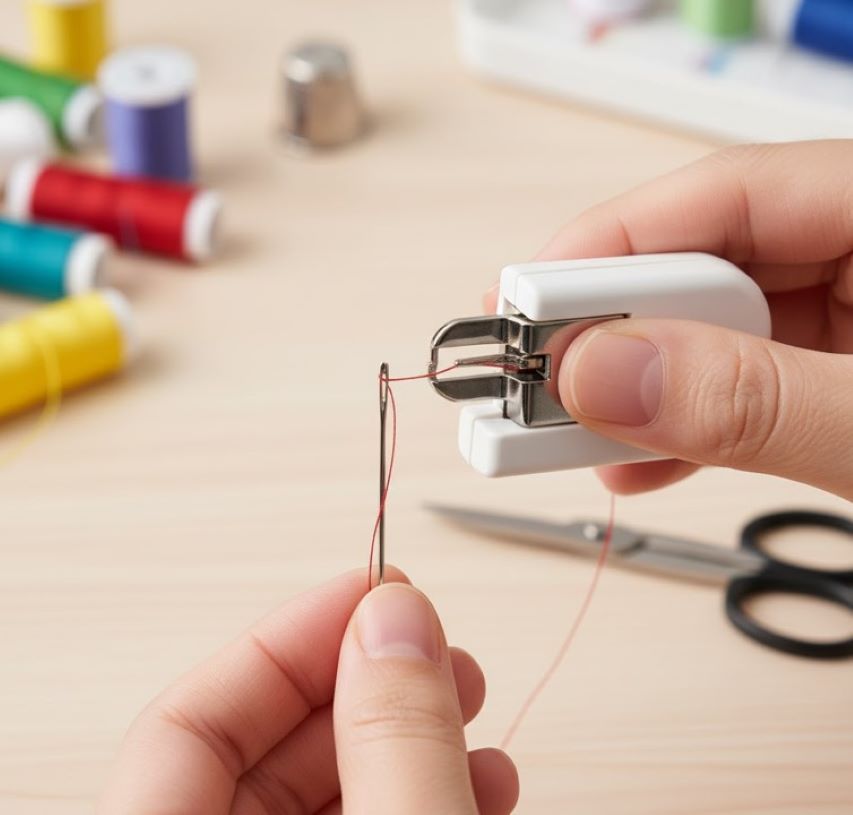
This is the most common and inexpensive type, often made of plastic and metal. Design: It consists of a small, flat handle (often plastic or stamped metal) with a thin, diamond-shaped metal plate attached. The "diamond" is actually a housing for the fine wire mechanism.
Usage: The needle is inserted into a notch on the diamond, with its eye centered over the hole. The lever (the diamond-shaped part itself) is pressed down, which pushes the wire through the eye. The thread is placed over the wire, and when the lever is released, the wire retracts, pulling the thread through.
- Built-In Sewing Machine Needle Threaders:
Most modern mid-range to high-end sewing machines feature a built-in automatic needle threader. Location: It is typically mounted on the needle bar assembly, just above the needle.
Usage: The process is highly standardized:
- The needle is in the highest position.
- The presser foot is raised.
- The thread is guided through the machine's tension discs and hooks, and placed into a catch on the threader arm.
- The user gently pushes the threader lever (usually a plastic or metal tab) all the way down.
- The mechanism engages, and a tiny hook passes through the needle eye, grabs the thread, and pulls it back through, creating a loop.
- The user pulls the loop under the presser foot, and the needle is threaded.
Needles with Self-Threading Features (e.g., Calyx Eye Needles):
This is a low-tech but effective "automatic" method. Instead of a separate device, the needle itself is designed for easy threading.
Design: The top of the needle's eye is open, resembling a calyx of a flower. Instead of a closed circle, there is a narrow slot leading from the top of the needle down into the eye.
Usage: The user simply pushes the thread sideways into the slot at the top, and it snaps down into the wider eye of the needle. It requires no moving parts but can be tricky with very slippery or thick threads.
Advantages and Limitations
Advantages:
Accessibility: A game-changer for sewers with visual impairments, arthritis, or hand tremors.
Speed and Efficiency: Dramatically reduces the time spent on repetitive threading.
Frustration Reduction: Eliminates one of the most tedious parts of sewing and embroidery.
Precision: Often more reliable than threading by hand, especially with very fine needles.
Limitations and Common Problems:
Fragility: The fine wire is the most vulnerable part and can easily bend or break if forced.
Thread Compatibility: They can struggle with very thick, fluffy, or slippery threads (e.g., metallic, wooly nylon). The fine hook may not grip them effectively.
Needle Size: Very large-eyed needles (like for yarn) or extremely small-eyed needles (like for fine beading) may not be compatible with standard threaders.
User Error: The most common cause of failure is incorrect positioning of the needle or thread. If the needle's eye is not perfectly aligned, the wire will bend against the needle instead of passing through.
A Brief History
The quest to ease needle threading is not new. Simple threading hooks have existed for centuries. However, the modern spring-based automatic needle threader was patented in the early 20th century. Its widespread adoption in home sewing coincided with the rise of consumer sewing machines in the post-WWII era, as manufacturers sought to make their machines more user-friendly and accessible.
The Automatic Needle Threader is a deceptively simple tool that embodies clever mechanical design. It serves as a vital aid, democratizing sewing and crafting by removing a significant barrier to entry and making the craft more enjoyable for everyone.
 |  |  |
 |  |  |