A sushi maker kit is a practical kitchen tool designed to help beginners and sushi lovers prepare perfect, restaurant-style sushi at home with ease. Whether you want to make classic rolls, nigiri, gunkan, or creative sushi shapes, this kit provides all the essential tools needed for a seamless experience. It simplifies the process, saves time, and allows you to enjoy fresh, homemade sushi whenever you want.
In this detailed guide, we’ll explore its features, tools, benefits, uses, and step-by-step instructions to help you understand why a sushi maker kit is a must-have for sushi enthusiasts.
Key Features of a Sushi Maker Kit
Complete Set of Tools
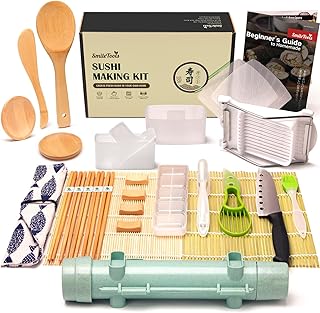
Most sushi kits include:
Sushi molds → For making rolls of different sizes and shapes.
Rolling mats (bamboo or plastic) → To roll sushi tightly and evenly.
Rice paddles & spreaders → For spreading rice without sticking.
Knives → Sharp, precise blades for cutting rolls neatly.
Sushi guides or recipe booklets → To assist beginners in learning techniques.
Multiple Sushi Styles
With a sushi maker kit, you can prepare:
Maki rolls → Traditional sushi rolls with seaweed outside.
Uramaki rolls → Inside-out rolls with rice on the outside.
Nigiri → Hand-pressed sushi with fish on top.
Gunkan maki → Oval-shaped sushi wrapped in seaweed.
Creative sushi shapes → Some kits come with molds for heart, square, or triangular sushi.
High-Quality, Food-Safe Materials
Typically made from BPA-free, food-grade plastic or natural bamboo.
Designed to be durable, reusable, and easy to clean.
Many kits are dishwasher-safe, making cleanup hassle-free.
Beginner-Friendly Design
Designed to make sushi preparation simple and fun.
Perfect for those who want consistent, professional-looking results without years of practice.
Ideal for families, cooking enthusiasts, and dinner parties.
Compact & Portable
Lightweight and easy to store.
Great for use at home, during picnics, or for sushi-making events.
Benefits of Using a Sushi Maker Kit
Saves Money → Making sushi at home is cheaper than eating at restaurants.
Customizable → Choose your favorite ingredients, fish, vegetables, and sauces.
Healthy Option → Control the quality and freshness of your ingredients.
Perfect for Beginners → Easy-to-use tools eliminate guesswork.
Fun Activity → Great for family cooking nights, parties, and gatherings.
How to Use a Sushi Maker Kit (Step-by-Step Guide)
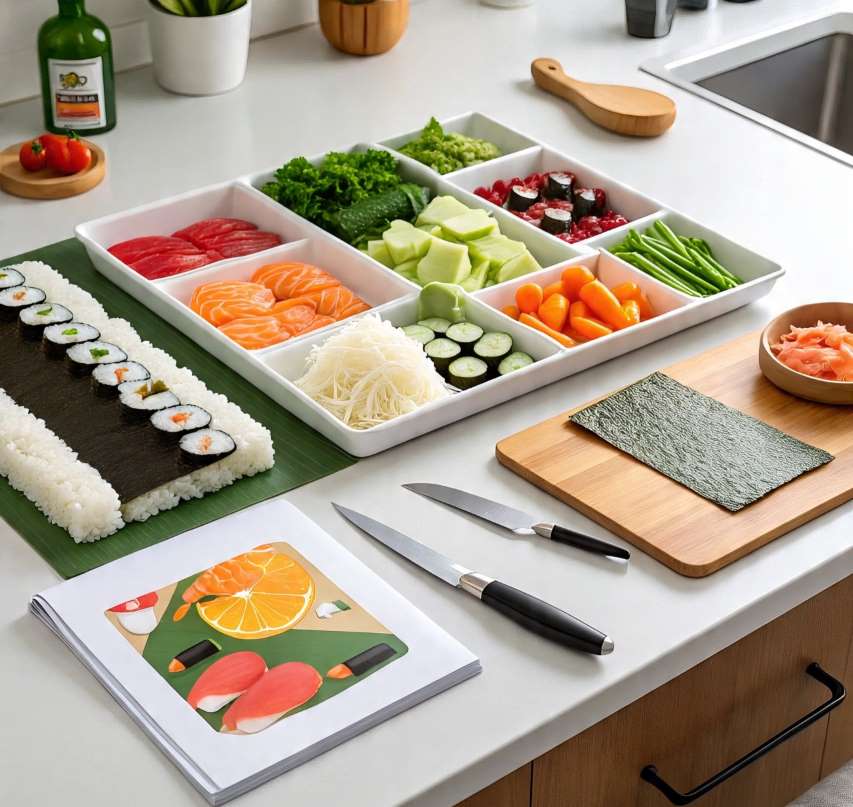
Step 1: Prepare Your Ingredients
Cook sushi rice and season it with rice vinegar.
Prepare fillings: fish, vegetables, avocado, cucumber, crab sticks, etc.
Have seaweed sheets (nori) ready for rolling.
Step 2: Choose Your Mold or Rolling Mat
If your kit includes molds → Place rice and fillings inside and press gently.
If you’re using a rolling mat → Lay a seaweed sheet on the mat, add rice, fillings, and start rolling tightly.
Step 3: Cut Sushi Rolls Evenly
Use the provided sharp knife to slice your rolls cleanly.
Wet the knife slightly to prevent rice from sticking.
Step 4: Serve and Enjoy
Arrange the sushi on a plate.
Serve with soy sauce, wasabi, and pickled ginger for an authentic experience.
Tips for Perfect Sushi Making
Always rinse sushi rice thoroughly before cooking.
Use fresh, high-quality fish if making raw sushi.
Keep your hands slightly wet when handling rice to prevent sticking.
Avoid overstuffing rolls — balance is key.
Experiment with creative shapes and fillings for fun results.
Care and Maintenance
Wash molds, mats, and tools after every use.
If the kit includes bamboo mats, wash them by hand and dry completely.
Store tools in a clean, dry place to ensure durability.
A sushi maker kit is a must-have kitchen companion for anyone who loves sushi and wants to make it at home. It combines convenience, creativity, and cost-effectiveness into one set, making sushi preparation simple, fun, and beginner-friendly. Whether you’re making traditional rolls or experimenting with modern sushi styles, this kit allows you to enjoy fresh, delicious, and beautifully crafted sushi whenever you want.
 |  |  |
 |  |  |