Electronic archiving systems and software play a vital role in preserving and managing information. The more files one deals with, the more they realize the importance of efficient data management. An electronic archiving system serves as an organized approach to store, organize, and retrieve information, ensuring its long-term accessibility and integrity.
Here, we explain the steps for setting up and working with the multilingual electronic archiving program, which stores, organizes, and encodes documents as follows:
Language Selection:
When opening the program, you will find an interface to choose your preferred language for working with the software. Here, we will select the English language and then click on the "Run" button.

Logging into the Program: Enter the username and password; here, the system admin's username is "ahmed," and the password is "123."

System Admin Interface:
This interface will appear for the system admin, providing access to settings and entry into the electronic archiving program.

Note: It is essential not to close the login form during operation to maintain the connection between the system user's permissions and the program.
Program Folder Path Settings:
By clicking on Settings, this interface will appear for entering the folder path through which the program will operate.

Which can be done by copying the path of the chosen folder to run the program

Then paste the path by pressing Ctrl+V and then pressing Save

The path to the program folder can be on a shared folder on one of the devices or on one of the servers

System Users and Their Permissions:
By clicking on "Users," this interface will appear to add, modify, or delete system users and specify their permissions, which are as follows:
Admin: Have access to all menus, allowing them to modify all program components.
Edit: Only sees the archive menu, enabling them to add, delete, and modify files and documents within the program.
Read: Only sees the archive menu and can view documents and files, but cannot add, delete, or modify anything within the program.

Changing the Password:
When clicking on "Change Password," this interface will appear to change the current password for the system admin or any other user.

File Types:
When clicking on "File Types," this interface will appear to add, modify, and encode the types of files to be entered into the program. It includes details such as the File Type (e.g., Financial Department), the file path in the program folder (e.g., Finance), and the Code. The file code will be added to the document name when recording it in the program. For example, the code "F" here.

Once any file type is registered, a folder with the same name as the path will be created inside the program folder.

Documents: When clicking on "Documents," this interface will appear to add, modify, and encode the names of the documents to be entered into the program. It includes details such as the document name (e.g., Ownership Documents), the document code, which will be added to the document's name when registering it in the program. For example, ow

File Status: When clicking on "File Status," this interface will appear to add and modify the various statuses to be entered into the program for each file. For example, statuses like "In Progress," "Completed," and "On Hold" can be added and modified here.

Rooms: When clicking on "Rooms," this interface will appear to add and modify the names of the locations where files are stored in the program. These locations could be, for example, a room, department, or section.

Cupboards: When clicking on "Cupboards," this interface will appear to add and modify the names of the cupboards where files are stored in the program. These could be, for example, a cupboard, Treasury, or stand.

Shelves: When clicking on "Shelves," this interface will appear to add and modify the names of the shelves where files are stored in the program. These could be, for example, a shelf or drawer.

The Archive: When clicking on "The Archive," this interface will appear for adding and modifying files in the program. When selecting the file type, an automatic number will be assigned to the file for this type in the current year, which can be modified according to your needs.

Upon saving the file, a folder will be created with the file number inside a folder named with the year, within a folder named with the file type.

We click on the dropdown menu next to the document name to select the document to be registered within this file

And next to it appears the number of attachments for this document, which is currently zero because it is a new document and has not been attached to any documents yet. To add attachments, we click on the number adjacent to the document to open the following interface.

This interface allows adding or deleting any attachments to the document. To add attachments to this document, we click on "Add," choose the pages or attachments to be added to this document (in PDF format). Here, you can select one file or multiple files together, then click "OK".

The selected pages or attachments will be added to the program and moved to the folder created with the file number, encoding them in sequence based on their quantity. For example, the first page or attachment will be encoded and renamed to F20241ow1, where the leftmost letter represents the file type code, followed by the year, the file number, the document code, and an automatic number for the page or attachment sequence.

Upon closing the attachments upload form, the number of attachments will appear next to the document, along with the names and the total number of all attachments after encoding.

If any of the attachments are deleted, they will be removed from the database, not the folder. Deleted or unregistered files will appear on the left side.

If the "Export File" button is pressed, the documents of the file will be copied to a folder named after the file subject inside a folder named "Export" within the main program directory.

If the "Print" button is pressed, the file content will be printed, displaying the number of documents, the file creator’s name, the last modifier, the creation date, and the last modification date.

The Second Version of the Program
Modifications have been made to the settings to provide you with the ability to edit or change the database name. Additionally, the functionality to create a backup and restore the database at any time has been implemented as follows:
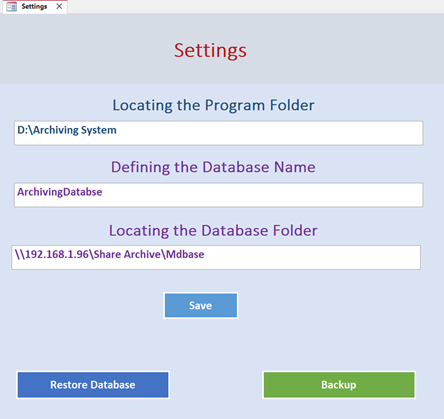
Database Name
You can leave the default name for the database or change it to the desired name.
Database Location
You can leave the database location inside the program folder or change it, either on your device or in a shared folder on another device or server. This allows you to separate the database from the files stored in the program.
Once you click 'Save,' the program will become a shortcut to the specified location of the database. You can then copy this shortcut to any other location and work with a single database, whether you are a single user or multiple users.
Backup
You can create a backup of the database at any time to preserve your data.
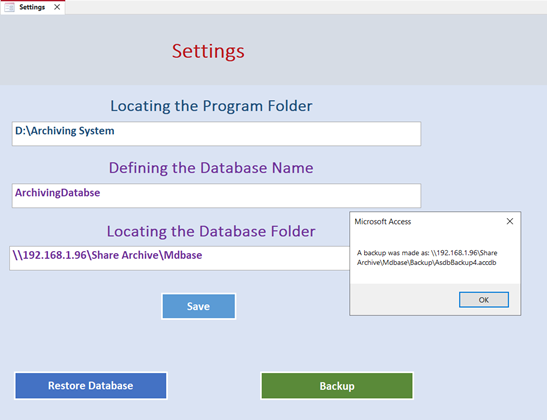
By clicking on 'Backup,' a copy of the database will be created in a folder named 'Backup' with automatic sequencing.
Restore Database
You can restore any previously created backup of the database if the need arises.
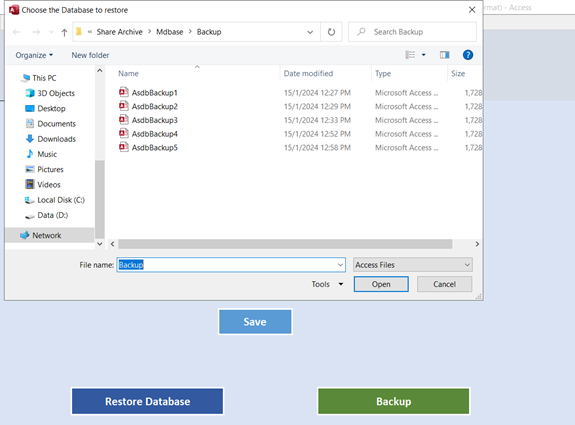
By clicking on 'Restore Database,' this window will appear. Through it, you can choose one of the backup copies to restore instead of the current database. To do this, it is necessary to end any user connections so that the current database can be replaced with the selected backup version
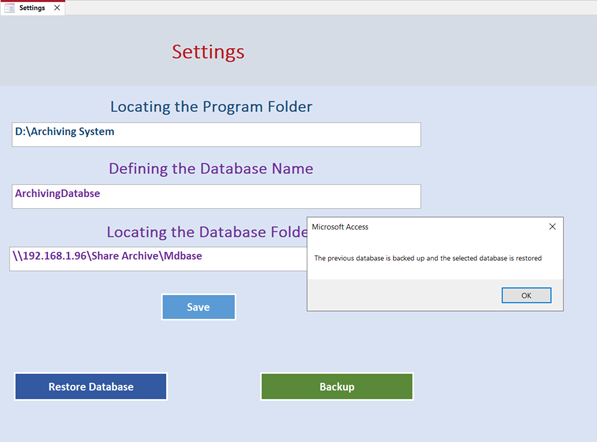
Once you select the backup version and click 'Open,' this message will appear indicating that a backup copy of the previous database has been created, and the selected database has been restored.
Request Professional Edition
Download Free Trial >> 👇 👇 👇
Free Multilingual Electronic Archiving Program V3 Download
Free Multilingual Electronic Archiving Program V2 Download
Free Multilingual Electronic Archiving Program V1 Download
 |  |  |
العمل من خلال شبكة
هل ممكن العمل على سيرفر ومستخدمين من خلال الشبكة الداخلية ؟
العمل من خلال شبكة
نعم يمكن باختيار المسار على المجلد على السيرفر ثم اختيار اختصار لنقل البرنامج اليه وتصبح نسخة البرنامج كاختصار يمكن العمل منه من خلال المستخدمين وفقا لصلاحياتهم للوصول للمجلد الموضوع عليه قاعدة البيانات على السيرفر