A drill bit sharpener is a specialized tool or machine designed to grind a new, sharp cutting edge onto a worn, dull, or damaged drill bit. Instead of discarding expensive bits, a sharpener restores them to like-new condition, saving money and improving drilling efficiency.
Why Sharpen Drill Bits?
Performance: Sharp bits cut faster, with less effort and pressure required from the drill.
Quality: They produce cleaner, more precise holes with smoother walls and less burring.
Safety: Dull bits are dangerous. They can slip, bind, or snap, potentially causing injury.
Cost Savings: A good sharpener pays for itself after saving a few high-quality bits (e.g., cobalt, carbide).
Convenience: No more trips to the store because your bits are dull.
Types of Drill Bit Sharpeners
| Type | How It Works | Pros | Cons | Best For |
|---|---|---|---|---|
| Manual/Jig Sharpeners | A fixture holds the bit at a precise angle against a bench grinder or sharpening stone. User manually rotates and grinds the bit. | Inexpensive, teaches the fundamental skill of sharpening. | Slow, requires significant skill and practice to master. Inconsistent results for beginners. | DIYers, purists, those on a tight budget. |
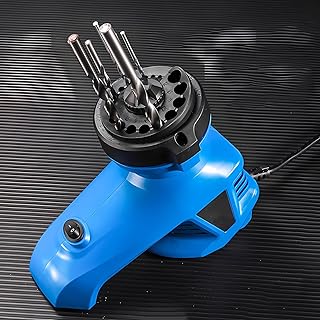
| Dedicated Bench-top Sharpeners | Self-contained units with an electric motor, grinding wheel, and a built-in chuck and guide to hold the bit at the exact correct angle. | Fast, easy, and consistent. Requires minimal skill. Most can handle a wide range of bit sizes. | Higher upfront cost. Takes up bench space. | Serious DIYers, mechanics, woodworkers. The best balance of price and performance. |
| Industrial/Professional Sharpeners | CNC or complex mechanical systems for sharpening specialty bits (e.g., step bits, countersinks) with extreme precision. | Extremely precise, can sharpen complex geometries. | Very expensive, large, and complex. | Machine shops, industrial settings, professional sharpening services. |
Key Features to Consider
Bit Compatibility:
Size Range: What is the minimum and maximum bit diameter it can handle? (e.g., 3/32" to 3/4").
Bit Type: Most handle standard HSS twist bits. Check if it works with cobalt, titanium-coated, masonry, or carbide bits.
Point Angles: Can it sharpen common angles like 118° (standard) and 135° (self-centering, for metal)?
Ease of Use:
Chuck System: A self-centering chuck makes loading bits quick and easy.
Angle Guides: Pre-set stops for common point angles ensure consistency.
Visual Aids: Some have built-in magnifiers or lights to help you see the cutting edge.
Grinding Wheel:
Material: Typically, aluminum oxide for HSS bits. Diamond wheels are needed for carbide.
Grit: Fine grit (e.g., 100-150) produces a sharper, smoother edge.
Power Source: Most are electric (110V), but some manual models exist.
Pros vs. Cons of Using a Sharpener
✅ Advantages
Saves Money: Drastically reduces the need to buy new drill bits.
Improves Results: Sharp bits make cleaner holes with less effort.
Increases Safety: Reduces the risk of bits breaking or slipping.
Eco-Friendly: Reduces waste from discarded metal bits.
❌ Limitations
Learning Curve: Manual types require practice to get right.
Initial Cost: A good bench-top sharpener is an investment.
Limited Lifespan: Each sharpening removes a tiny amount of material. A bit can only be sharpened a finite number of times before it becomes too short.
Top Brands & Models
| Brand | Popular Model | Key Feature | Price Range |
|---|---|---|---|
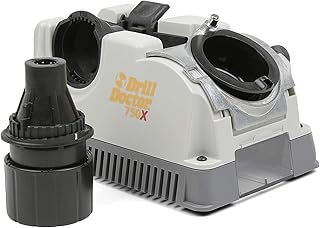
| Drill Doctor | DD500X, DD750X | The market leader. Easy to use, consistent results for most twist bits. | $100 - $250 |
| Tormek | T-4 (with jig) | High-end water-cooled system for ultra-sharp, precise edges. Prevents overheating. | $400+ |
| Work Sharp | WS3000 | A modern take with a guided system and broad compatibility. | $150 - $200 |
| Generic/Shop Brands | Various | Often found at hardware stores. Can be hit or miss on quality and consistency. | $50 - $150 |
How to Use a Bench-top Sharpener (General Steps)
Secure the Sharpener: Clamp it to a sturdy workbench.
Insert the Bit: Insert the dull bit into the chuck up to the stop line.
Set the Angle: Select the desired point angle (e.g., 118°).
Align the Edge: Position the bit so the worn cutting edge is against the grinding wheel.
Sharpen: Turn on the machine and follow the instructions (often involving a simple rocking or rotating motion). A few seconds of grinding is usually enough.
Repeat: Sharpen the other flute (cutting edge) to ensure the point is centered.
Test: Drill a test hole in a scrap piece of material to check the bit's performance.
⚠️ Safety Tip: Always wear safety glasses when sharpening. The process creates fine metal dust. Consider a dust mask as well.
Price Range
Tier | Price Range (USD) | What to Expect |
|---|---|---|
Budget | $20 - $60 | Simple manual jigs or low-quality electric models. Inconsistent results. |
Mid-Range | $60 - $200 | The sweet spot. Reliable, easy-to-use bench-top models like the Drill Doctor. |
Professional | $200 - $600+ | High-precision systems like Tormek for workshops and professionals. |
A drill bit sharpener is a wise investment for anyone who regularly uses drill bits beyond the most basic level. It turns a frustrating, dull bit back into a precision cutting tool in under a minute, saving you time, money, and frustration. For most people, a dedicated bench-top model like the Drill Doctor offers the best balance of ease and results.
 |  |  |
 |  |  |